Desserts
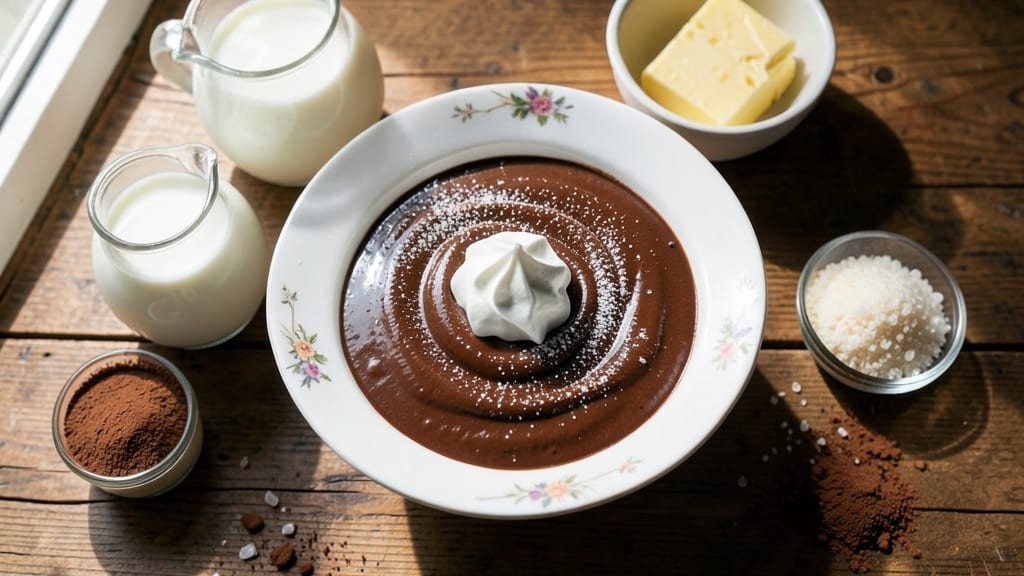
Creating your own pudding mix recipe from scratch transforms a simple dessert into something deeply comforting—just add milk and minutes. The key lies in balancing cornstarch, sugar, and flavorings to achieve that signature velvety texture and rich taste without store-bought shortcuts.
I developed this version after years of testing, ensuring it sets perfectly every time while remaining adaptable for dietary needs.
This recipe delivers restaurant-quality results with just five core ingredients and minimal effort. The secret is cooking the mixture to the right temperature, which prevents graininess and creates that signature smooth, spoonable consistency.
Whether you prefer classic vanilla or modern flavors like chocolate or coconut, the base technique remains the same—simple yet foolproof.
What you’ll end up with is a creamy, dreamy dessert that’s ready in under 15 minutes of active time, plus chilling. The pudding develops a luxurious mouthfeel with a slight sheen on top, proving that homemade truly tastes better.
Serve it warm with whipped cream or chilled for a lighter treat—either way, it’s pure comfort in a bowl.
Perfect for meal prep, potlucks, or satisfying a late-night craving, this pudding mix adapts easily to vegan alternatives or gluten-free thickeners. The instructions walk you through every step, from mixing to setting, ensuring success the first time. Let’s get started!
Ingredients for pudding mix
Five simple staples transform into velvety comfort with just milk and minutes.
| Ingredient | Amount | Notes |
|---|---|---|
| Cornstarch 🌾 | ½ cup | Fine grain for smooth texture |
| Granulated Sugar 🍚 | ¾ cup | White or light brown |
| Salt 🧂 | ½ tsp | Diamond Crystal kosher preferred |
| Vanilla Extract 🌿 | 1 tbsp | Pure Madagascar preferred |
| Whole Milk 🥛 | 2 cups | Cold for best texture |
| Unsalted Butter 🧈 | 2 tbsp | Cold, cut into small pieces |
| Cocoa Powder 🍫 | ¼ cup | Optional for chocolate flavor |
| Ground Cinnamon 🌿 | ½ tsp | Optional for spiced variation |
The cornstarch is non-negotiable—it's what gives pudding that signature silky texture. Bob's Red Mill or Arrowhead Mills brands work best for fine grain, but any cornstarch will do in a pinch. Sugar can be swapped for turbinado or coconut sugar for subtle flavor variations, though white sugar keeps things classic. Vanilla extract? Go for pure Madagascar if you can—it's worth the splurge for that rich aroma. The milk should be cold straight from the fridge; room temperature can lead to graininess. For chocolate lovers, Hershey's Special Dark cocoa powder adds depth without bitterness.
No vanilla extract? Vanilla bean paste or even vanilla sugar works in a bind. Want to skip butter? A pinch of salt in the milk enhances flavor without adding fat. For chocolate pudding, reduce sugar slightly to 0.6 cup since cocoa adds natural sweetness. The cinnamon is optional but adds warmth—McCormick ground cinnamon is my go-to for consistent flavor. If you're making this ahead, store the dry mix in an airtight container for up to 3 months; just add milk when ready. The butter should be cold when added to prevent lumps in the finished pudding.
This mix doubles as a base for cheesecake fillings or trifles—just add an extra egg yolk for stability. For vegan versions, substitute cornstarch with arrowroot powder and use almond milk. The pudding sets best when chilled for at least 2 hours, but it's ready to eat after 15 minutes of cooking. I like to serve it with whipped cream and fresh berries for a restaurant-worthy touch. Leftovers keep for 4 days in the fridge, though they rarely last that long.
Why You'll Love This Recipe
- Five-Minute Mix: I swear, this is the kind of recipe where you measure, stir, and boom—no waiting for eggs to set or custards to temper. Just cornstarch, sugar, and milk on the stove for 5 minutes, and suddenly you’ve got that silky, velvety texture without the fuss.
- Vanilla Magic: That first spoonful of warm pudding with real vanilla extract? It’s like dessert sneaking up on you. The sugar caramelizes just enough to balance the creamy milk, and the salt—don’t skip it—takes it from sweet to ridiculously good.
- Endless Twist: Make it for breakfast with a sprinkle of cinnamon, dessert with whipped cream, or even a quick sauce for fruit. The base is the same, but the possibilities? Honestly, I’ve used it for everything from a lazy Sunday brunch to a last-minute potluck—no one ever guesses it’s just pantry staples.
Step-by-step instructions for homemade pudding mix
Here's how to make your own instant comfort pudding mix that delivers restaurant-quality texture every time.
Whisk Dry Ingredients Together
In a medium bowl, combine the 0.5 cup cornstarch, 0.75 cup granulated sugar, 0.5 teaspoon salt, 0.25 cup cocoa powder, and 0.5 teaspoon ground cinnamon. Use a whisk to break up any cocoa powder lumps and ensure everything is evenly distributed. This step is crucial for preventing grainy texture in your final pudding.
The cocoa powder and cinnamon will create a rich, aromatic base that infuses throughout the mixture. I like to press the ingredients through a fine-mesh sieve at this stage to eliminate any remaining clumps. This ensures your pudding will have that silky, velvety consistency we all love.
Cut in Cold Butter
Add the 2 tablespoons cold unsalted butter to the dry mixture. Using a pastry cutter or your fingers, work the butter into the dry ingredients until it's completely incorporated and resembles coarse crumbs. The butter should be evenly distributed but still visible as small flecks.
This cold butter technique creates tiny fat pockets that will melt during cooking, resulting in that luxurious, creamy texture. Don't overwork the mixture here—just until everything comes together. If you press the mixture between your fingers, it should hold its shape but still feel slightly gritty.
Add Vanilla Extract
Drizzle in the 1 tablespoon vanilla extract and stir with a wooden spoon until fully combined. The vanilla will create a fragrant aroma that signals your mix is ready for use. This is where the magic happens—vanilla enhances the natural sweetness while adding that comforting, homey flavor we associate with classic pudding.
Give the mixture one final taste test. It should be sweet but not cloying, with a subtle hint of cocoa and cinnamon warmth. If you're making a vanilla version, simply omit the cocoa powder and cinnamon at this stage. The mix will keep in an airtight container for up to 3 months.
Prepare the Pudding
To make the pudding, combine 2 cups cold whole milk with 2 tablespoons of your homemade mix in a medium saucepan. Whisk vigorously to dissolve any lumps. Place the pan over medium heat and bring to a gentle simmer, stirring constantly with a wooden spoon.
Once the mixture begins to thicken—about 3-5 minutes—remove it from heat. The pudding should coat the back of a spoon and leave a clear path when you run your finger through it. This is your signal that the starch has fully activated and the pudding is ready.
Finish and Serve
Transfer the pudding to serving bowls and let it cool to room temperature. For best results, refrigerate for at least 2 hours before serving. The cold temperature allows the flavors to fully develop and creates that perfect, firm yet creamy texture we all crave.
Serve with whipped cream, fresh berries, or a sprinkle of chocolate shavings for that extra touch of comfort. The homemade mix delivers a depth of flavor and texture that store-bought versions simply can't match. This is the kind of dessert that feels like a warm hug in bowl form.
Pro Tips For Making Pudding Mix
- STIR CONSTANTLY AT FIRST: The first 2 minutes after mixing cornstarch and milk is when lumps form fastest—like a stubborn guest who won’t leave. Use a whisk and keep your arm moving until the mixture is completely smooth, even if it looks like you’re doing push-ups over the pot.
- USE COLD MILK ONLY: Warm milk makes pudding grainy, no matter how much you whisk. Grab milk straight from the fridge—even if it’s winter—and let it sit out just 5 minutes before using. Cold milk dissolves cornstarch better and gives you that silky texture you’re after.
- SALT THE MILK FIRST: Toss that pinch of salt into the milk before adding cornstarch. It’ll distribute evenly, and you won’t end up with a bland pudding that tastes like it’s missing something. (Yes, even a little salt makes vanilla pudding taste richer—trust me.)
- WHISK VANILLA IN LAST: Add vanilla extract after the pudding thickens and cools slightly—otherwise, it’ll cook off too fast and leave you with a sad, under-flavored dessert. Stir it in when the mixture is just off the heat but still warm, so every spoonful gets that deep vanilla punch.
Make-ahead tips for this recipe
Prep the Mix Ahead
Store your homemade pudding mix in an airtight container with a tight-sealing lid. I use glass jars with silicone seals to prevent moisture loss. Label with the flavor and date—this mix stays fresh for up to 3 months at room temperature, making it perfect for pantry staples.
The dry ingredients keep their potency longer than store-bought mixes, which often lose flavor after just 2 months. 💡
Freeze for Later Use
For longer storage, freeze the mix in 1-tablespoon portions using ice cube trays. Once frozen, transfer cubes to a ziplock freezer bag and flatten to save space. Thaw overnight in the fridge before using—just add milk as directed.
This is ideal for weekly dessert prep or camping trips where refrigeration isn't available. The cold storage preserves the cornstarch's thickening power perfectly. ❄️
Make Pudding in Bulk
Double or triple the recipe and prepare the pudding ahead in 8-ounce ramekins. Chill for 4 hours or overnight, then cover tightly with plastic wrap. Reheat individual portions in the microwave for 1-2 minutes at 50% power—just until warm through.
The texture remains silky when reheated this way, unlike store-bought puddings that often turn rubbery. 🔥
Portion for Individual Servings
Divide the dry mix into single-serving packets using quart-sized ziplock bags. Weigh out 2 tablespoons per bag for perfect portions. Seal tightly and store in the pantry. When ready to serve, guests can simply add 2 cups milk and follow the cooking instructions.
This is a game-changer for potlucks or office dessert trays—no measuring required! 📅
Chill vs. Warm Serving
For chilled pudding, prepare the full batch and refrigerate for 4+ hours. The texture becomes firmer but still creamy, perfect for summer desserts. For warm pudding, cook as directed but serve immediately with a sprinkle of cinnamon or nutmeg.
I often make a half-batch warm and half chilled when hosting—everyone gets their preferred temperature. ✨
Flavor Layering Trick
Prepare two batches of pudding—one vanilla, one chocolate—and layer them in clear glasses with whipped cream between. Chill for 2 hours before serving. The contrast of warm cocoa and sweet vanilla creates a restaurant-worthy effect with minimal effort. This technique works especially well for holiday gatherings where presentation matters. 💛
Nutrition facts
Frequently asked questions
Can I make this pudding mix without cornstarch?
Cornstarch is essential for that signature silky texture, but you can substitute arrowroot powder in a 1:1 ratio for a similar result. For a vegan version, arrowroot works perfectly with plant-based milk. Avoid flour—it creates a heavier, less creamy consistency that won't set properly.
Why did my pudding turn out grainy?
Graininess usually means the mixture wasn't stirred enough while cooking or the heat wasn't low enough. Always cook over medium-low heat and whisk constantly until it thickens. For extra smoothness, strain the finished pudding through a fine-mesh sieve before chilling. Cold milk also helps prevent lumps.
How do I make this recipe gluten-free?
This recipe is naturally gluten-free since it only uses cornstarch and milk. Just ensure your cocoa powder and cinnamon are certified gluten-free. For extra caution, check milk labels—some brands process in facilities with gluten. The texture remains identical to the original!
Can I use powdered milk instead of fresh milk?
Yes, but you'll need to adjust the liquid ratio. Replace 2 cups whole milk with 1 cup powdered milk + 1 cup water. The texture will be slightly lighter, but it works in a pinch. For best results, use whole milk—it creates a richer, creamier finish.
What are some creative ways to use this mix?
Beyond classic pudding, try it as a pie filling, cheesecake layer, or even a creamy sauce for fruit. For a fun twist, mix 1 tablespoon of your dry mix with 1 cup milk and 1 egg yolk to make instant custard. The possibilities are endless—think pudding popsicles or trifle layers!