Side Dishes
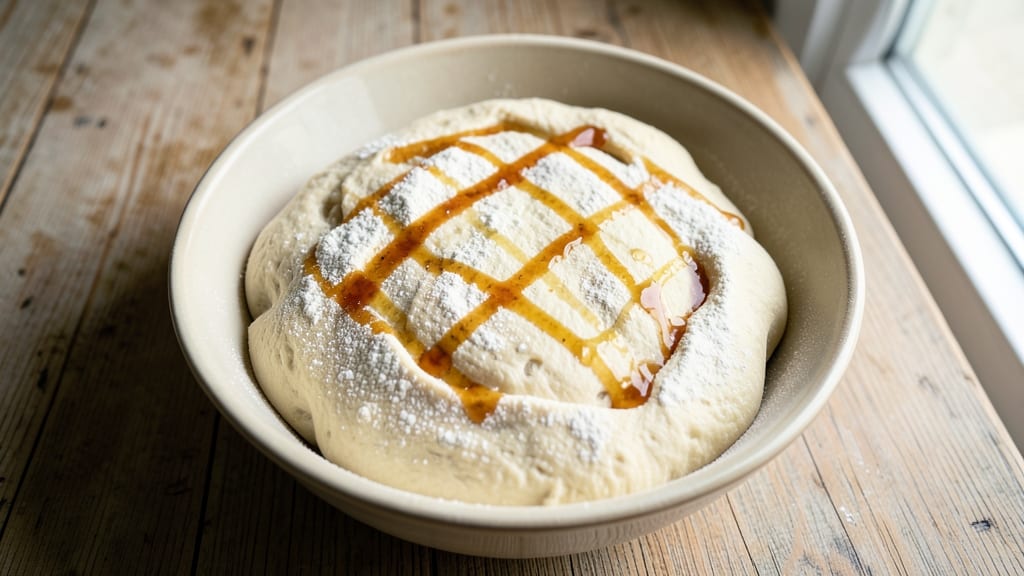
This Subway copycat bread recipe isn’t just possible—it’s easier than you think, with that perfect toasted crust and chewy pull-apart magic. This copycat recipe delivers the same texture and flavor that made Subway famous, using a precise dough formula and baking technique that ensures every loaf turns out exactly right.
The secret lies in the dough's hydration balance and the steam method during baking, which creates that signature crispy exterior and soft interior.
What sets this bread apart is its foolproof method that requires no special equipment beyond a standard home oven. The dough comes together with simple ingredients—high-gluten flour for structure, yeast for rise, and a touch of honey for that subtle sweetness that defines Subway bread.
After shaping the loaves into their iconic rectangular form, the baking process uses a steam technique to mimic commercial bakery results, giving you that signature toasted crust that's crispy yet tender.
By following these exact steps, you'll achieve bread that's golden-brown on the outside with a soft, airy crumb inside—just like the original. The pull-apart texture is what makes this bread so satisfying, and it's all thanks to the precise dough development and baking method.
Whether you're making sandwiches or serving as a side, this bread will elevate any meal with its authentic Subway flavor and texture.
This recipe is perfect for home bakers who want restaurant-quality bread without the guesswork. The instructions are detailed enough to guide you through every step, from dough preparation to baking, ensuring consistent results every time. Once you try this copycat version, you'll never buy store-bought bread again—it's that good.
Ingredients for subway copycat bread
Simple ingredients, precise technique—this copycat bread nails Subway's signature texture and flavor.
| Ingredient | Amount | Notes |
|---|---|---|
| High-Gluten Flour 🌾 | 4 cups | King Arthur or Bob's Red Mill preferred |
| Active Dry Yeast 🍞 | 2 ¼ tsp | Fresh yeast at 1.125 tsp if available |
| Granulated Sugar 🍚 | 1 tbsp | White or light brown sugar |
| Salt 🧂 | 1 ½ tsp | Kosher or sea salt preferred |
| Honey 🍯 | 1 tbsp | Light or wildflower variety |
| Warm Water 💧 | 1 ¼ cups | 110-115°F, not boiling |
| Unsalted Butter 🧈 | ¼ cup | Cold, cubed, full-fat preferred |
| Milk 🥛 | ¼ cup | Whole milk for richness |
| Large Eggs 🥚 | 1 whole | Room temperature |
| All-Purpose Flour 🌾 | ½ cup | For dusting work surface |
| Cornmeal 🌽 | ¼ cup | For baking sheet dusting |
| Ice Cubes ❄️ | ½ cup | For steam during baking |
The high-gluten flour is non-negotiable here—it gives that signature chewy pull-apart texture. King Arthur or Bob's Red Mill are your best bets for consistent results. If you can't find high-gluten, bread flour** works in a pinch, but the texture will be slightly less authentic. The yeast should be fresh; if using active dry, make sure it's within its expiration date. For the honey, light or wildflower varieties work best—they add subtle sweetness without overpowering. The warm water temperature is critical: too hot kills the yeast, too cold slows activation. 110-115°F is ideal, and a thermometer ensures accuracy.
No high-gluten flour? Bread flour plus 1 tbsp vital wheat gluten per cup mimics the protein structure. The butter can be swapped for vegetable shortening if you're avoiding dairy, though the flavor won't be identical. For a dairy-free version, use unsweetened almond milk instead of whole milk. The eggs can be omelet-sized if you're making larger loaves—just adjust the dough weight proportionally. If you're baking multiple loaves, pre-shape the dough balls and let them rest in the fridge overnight for easier handling. The ice cubes during baking create steam, which is key for that crispy crust—don't skip this step!
Dough keeps best in an airtight container in the fridge for up to 3 days, though it's best used within 24 hours for optimal texture. For longer storage, portion the dough into balls, wrap tightly in plastic, and freeze for up to 3 months. Thaw overnight in the fridge before shaping. The baked loaves stay fresh at room temperature for 2 days, wrapped in a clean kitchen towel to maintain moisture. Toasted slices reheat beautifully in a toaster or oven—350°F for 5-7 minutes restores that fresh-baked crunch.
Why You'll Love This Recipe
- No-Knead Magic: I swear by this dough—just mix, let it rise, then bake. The high-gluten flour does all the heavy lifting while I sip coffee. (Yes, even on a Tuesday night.)
- Honeyed Crust Perfection: That caramelized honey crust? It’s the star. The yeast and sugar combo gives it this irresistible chew, while the honey adds a subtle sweetness that pairs perfectly with savory sandwiches.
- Sandwich Night Savior: Freeze the dough in balls for quick assembly later. Toss it in a hot oven, and boom—fresh bread for lunches all week. (My kids still beg for it even after school meals.)
- Budget-Friendly Staple: Four ingredients, endless possibilities. A single batch stretches into sandwiches, toast, or even garlic bread—no fancy add-ons needed. My wallet (and my taste buds) thank me.
Step-by-step instructions for Subway copycat bread recipe
Master the art of Subway-style bread with this foolproof method—perfectly chewy, toasted crust, and pull-apart magic.
Activate the Yeast for Maximum Rise
In a large mixing bowl, combine the 1.25 cups warm water (between 110-115°F), 1 tbsp granulated sugar, and 2.25 tsp active dry yeast. Let this sit for 5-10 minutes until the mixture becomes frothy and bubbly—this confirms the yeast is alive and ready to work. If it doesn’t bubble, your yeast may be dead, and you’ll need to start over.
Once bubbly, add the 1 tbsp honey and stir gently. The honey feeds the yeast during fermentation, creating a lighter, more flavorful bread. Let this mixture sit for another 5 minutes while you prepare the remaining ingredients. This step ensures your dough will rise properly and develop that signature chewy texture.
Mix the Dough Until Smooth and Elastic
In the same bowl, add the 4 cups high-gluten flour, 1.5 tsp salt, the 0.25 cup unsalted butter (cold, cubed), and the 0.25 cup milk. Using a wooden spoon or dough whisk, mix until the ingredients begin to come together. The high-gluten flour is key here—it gives the bread its signature chewiness and pull-apart quality.
Gradually add the 1 whole large egg and mix until fully incorporated. The dough will be shaggy at first, but don’t worry—this is normal. Once combined, turn the dough out onto a lightly floured surface (use the 0.5 cup all-purpose flour for dusting) and knead for 8-10 minutes until smooth and elastic. You’ll know it’s ready when it springs back slowly when poked and doesn’t stick to your fingers.
Let the Dough Rise for Optimal Flavor and Texture
Shape the dough into a ball and place it back in the mixing bowl. Cover the bowl loosely with a clean kitchen towel or plastic wrap and let it rise in a warm place for 1-1.5 hours, or until it has nearly doubled in size. A warm spot, like near the oven with the light on, helps speed up fermentation without overproofing the dough.
During this time, the yeast will work its magic, creating air pockets that give the bread its light, airy texture. Avoid rushing this step—proper rising is what separates homemade bread from store-bought. Once the dough has risen, gently punch it down to release the air and shape it into a 12-inch log on a baking sheet dusted with 0.25 cup cornmeal. This prevents sticking and adds a slight crunch to the bottom crust.
Bake with Steam for a Toasted, Crispy Crust
Preheat your oven to 375°F. Place the shaped dough log on the prepared baking sheet and cover it tightly with aluminum foil. This traps steam inside the oven, creating the perfect environment for a soft, chewy interior and a toasted, crispy exterior. Bake for 25 minutes covered, then remove the foil and bake for another 10-12 minutes until the bread is deep golden brown and sounds hollow when tapped on the bottom.
For the final touch, place 0.5 cup ice cubes on a small baking sheet and set it on the middle rack of the oven for the last 2 minutes of baking. The steam from the ice cubes will give the crust that signature toasted flavor and extra crispiness. Let the bread cool on a wire rack for 10 minutes before slicing—this ensures clean cuts and prevents a gummy texture.
Toast for Maximum Flavor (Optional but Recommended)
For the ultimate Subway experience, slice the bread and toast it lightly in a dry skillet over medium heat for 30-60 seconds per side until golden and slightly crispy. This step enhances the toasted flavor and makes the bread even more enjoyable. Serve warm with your favorite sandwich fillings or enjoy it plain—it’s that good.
The result? A bread so chewy and flavorful, you’ll forget you didn’t order it from Subway. The high-gluten flour and proper fermentation create that signature pull-apart magic, while the toasted crust adds a satisfying crunch. Store any leftovers in an airtight container for up to 3 days, or freeze for longer storage.
Pro Tips For Making Subway Copycat Bread
- Bloom the Yeast First: DESCRIPTION: Skip mixing yeast directly into dry flour—it wakes up faster in warm water with honey. Let it sit for 5-10 minutes until frothy (yes, even if it smells like a bakery). I learned this the hard way when my dough took three hours to rise because the yeast was still asleep.
- Weigh Your High-Gluten Flour: DESCRIPTION: Scooping leads to uneven batches—this dough needs precision. Use a kitchen scale for the flour (and yeast, if you’re picky). I was skeptical until I tried it; the texture became consistently chewy, not dense or crumbly.
- Don’t Over-Knead: DESCRIPTION: High-gluten flour fights back when you go overboard. Knead just until the dough springs back when poked (about 8-10 minutes by hand). After burning three batches with tough, rubbery bread, I finally stopped.
- Steam the Oven: DESCRIPTION: Spray the baking stone or pan with water before baking—this mimics Subway’s signature soft crust. Do it right as the oven hits 375°F, and cover the loaf loosely with foil if the top browns too fast. Sounds weird, but it works.
Serving suggestions for this recipe
Classic Sandwich Pairings
This bread shines as the foundation for classic Subway-style sandwiches. I love using it for a turkey breast and avocado combo with subway sauce (mix 2 tbsp mayo, 1 tbsp sweet pickle relish, 1 tsp Dijon mustard, and a pinch of paprika).
For a meat-lover’s version, pile on oven-roasted chicken, ham, salami, and provolone cheese with a drizzle of garlic aioli. 🥪
Breakfast Toast Variations
Toast slices in a skillet or toaster for a crispy breakfast treat. Spread with cream cheese and top with smoked salmon and red onion. Or try peanut butter and banana slices for a nostalgic kid-friendly option.
For a savory twist, add fried eggs and crumbled bacon on top. The bread’s chewy texture holds up perfectly to these toppings.
Gourmet Charcuterie Board
Slice the bread into thick rounds and arrange on a board with prosciutto, aged cheddar, fig jam, and walnuts. The toasted crust adds a satisfying crunch that balances the creamy cheeses.
For extra flair, drizzle with balsamic glaze or honey before serving. This makes an impressive appetizer for dinner parties or holiday gatherings. 🧀
Crispy Breadsticks
Cut the bread into 1-inch thick slices and brush with garlic butter (melt 2 tbsp butter with 1 minced garlic clove and ½ tsp parsley). Bake at 400°F for 5-7 minutes until golden and crisp.
Serve with marinara sauce for dipping—perfect for movie nights or as a side to soups. The bread’s chewiness transforms into a delightful, buttery bite.
Sweet Dessert Twist
For a dessert version, brush warm slices with melted butter and sprinkle with cinnamon sugar. Toast until golden and serve with vanilla ice cream or warm chocolate sauce. The contrast of sweet and toasted crust is surprisingly delicious.
You can also make French toast using this bread—dip slices in an egg-milk-cinnamon batter and cook in a buttered pan until crispy. 🍯
Meal Prep Strategies
Bake an extra loaf and store slices in an airtight container for up to 5 days. Toast before using to revive freshness. For sandwich prep, assemble ingredients in separate containers and layer with bread when ready to eat.
The bread’s texture holds up well to freezing—wrap individual slices in plastic and freeze for up to 3 months. Thaw at room temperature before toasting or using. 📅
Nutrition facts
Frequently asked questions
Why does Subway bread have that signature chewy texture?
The secret lies in the high-gluten flour and proper dough development. High-gluten flour creates a tight gluten network that gives the bread its signature chewiness and pull-apart magic. The dough also needs adequate kneading (8-10 minutes) and a 1-1.5 hour rise to develop flavor and structure. The steam method during baking further enhances this texture by creating a crispy crust while keeping the interior soft.
Can I make this bread without a stand mixer?
This recipe works perfectly with just your hands. After mixing the wet and dry ingredients in a bowl, turn the dough onto a lightly floured surface and knead by hand for 8-10 minutes until smooth and elastic. The key is consistent pressure—press, fold, and turn the dough repeatedly until it springs back slowly when poked. A little elbow grease goes a long way!
What’s the best way to reheat leftover bread?
For that fresh-baked taste, slice the bread and toast it in a dry skillet over medium heat for 30-60 seconds per side until golden and crispy. Alternatively, pop slices in a toaster for 1-2 minutes or warm them in a 350°F oven for 5-7 minutes wrapped in foil. Avoid the microwave—it makes the bread gummy. The steam method during reheating helps restore that toasted flavor.
Why did my bread turn out dense instead of chewy?
Dense bread usually means one of three things: underproofed dough (didn’t rise enough), too much flour during kneading, or insufficient hydration. Make sure your dough rises until it nearly doubles in size (1-1.5 hours). Also, avoid over-kneading—stop when the dough springs back slowly when poked. If using bread flour instead of high-gluten, add 1 tbsp vital wheat gluten per cup to mimic the protein structure.
Can I make this bread without honey?
Yes, but you’ll miss that subtle sweetness that defines Subway bread. Substitute the 1 tbsp honey with 1 tbsp granulated sugar or 1 tbsp maple syrup. The honey not only adds flavor but also helps feed the yeast during fermentation. If you skip it entirely, your bread will still be good, but the texture might be slightly less tender.