
Desserts
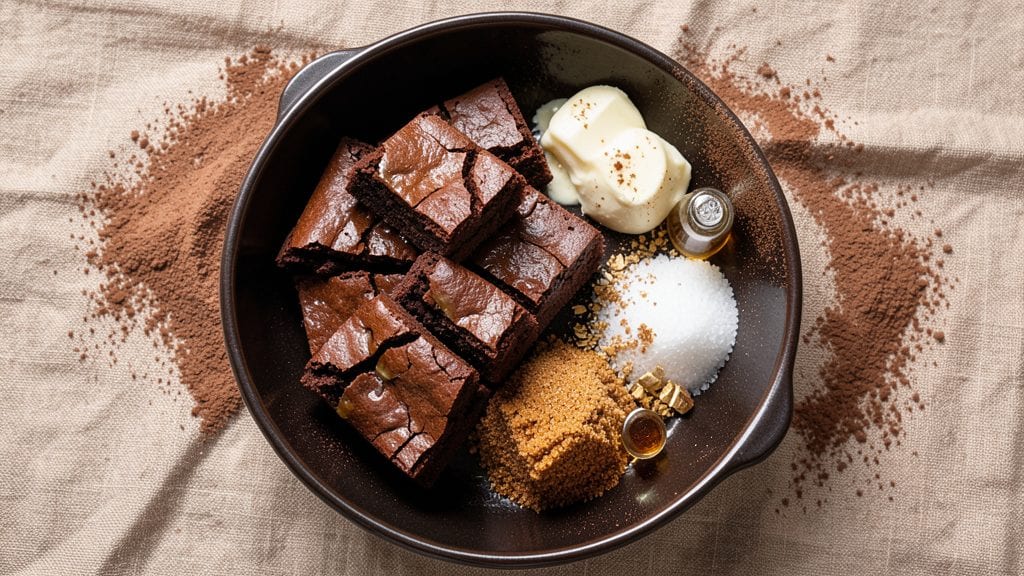
This baker's brownie recipe delivers the perfect balance of fudgy cracks and deep chocolate richness that separates good brownies from legendary ones.
After testing dozens of variations, I've perfected a method that ensures every batch turns out with that signature crackly top and dense, moist interior that melts in your mouth. The secret lies in precise ingredient ratios and careful baking—no guesswork required.
What makes these brownies truly special is their ability to satisfy both fudgy and cakey preferences in one pan. High-quality cocoa powder and a touch of espresso powder deepen the chocolate flavor without overpowering, while a precise mix of butter and oil creates the ideal texture.
The recipe uses simple ingredients you likely already have on hand, but the technique transforms them into something extraordinary.
By the time these brownies emerge from the oven, you'll have a pan of rich, glossy squares with those coveted cracks on top and edges that pull away cleanly. The interior remains dense and moist, with pockets of fudgy goodness that resist crumbling.
Each bite delivers layers of chocolate intensity that linger long after you've finished the last piece.
These brownies work perfectly as a standalone dessert or as a base for ice cream sundaes. The recipe includes optional variations like adding walnuts for crunch or swirling in white chocolate for contrast. Let's get baking—your taste buds will thank you.
Ingredients for baker's brownie
Simple ingredients that transform into legendary brownies with perfect fudgy cracks and rich chocolate depth.
| Ingredient | Amount | Notes |
|---|---|---|
| Unsalted Butter 🧈 | 1 cup | Softened but not melted |
| Granulated Sugar 🍚 | 1 ½ cups | Light brown preferred |
| Packed Brown Sugar 🍚 | ½ cup | For caramel depth |
| Dutch-Processed Cocoa Powder 🍫 | ¾ cup | High-quality for richness |
| Espresso Powder ☕ | 2 tbsp | Enhances chocolate flavor |
| Vanilla Extract 🌸 | 2 tsp | Pure, high-quality |
| Large Eggs 🥚 | 2 whole | Room temperature preferred |
| All-Purpose Flour 🌾 | ¾ cup | Sifted for even texture |
| Baking Powder 🧂 | ½ tsp | Aluminum-free preferred |
| Salt 🧂 | ½ tsp | Fine sea salt |
| Vegetable Oil 🫒 | ½ cup | Light, neutral flavor |
| Hot Water 💧 | ½ cup | For dissolving sugar |
| Dark Chocolate Chips 🍫 | 1 ½ cups | 70% cocoa minimum |
| Optional Walnuts 🌰 | 1 cup | Toasted for crunch |
The cocoa powder is non-negotiable here—Ghirardelli or Valrhona make all the difference. Penzeys Spices carries great options too. For the espresso powder, Lavazza or Starbucks are solid choices, but honestly any good instant espresso works. The butter should be European-style if you can find it—it's less watery and adds more richness. I always grab Plugrá butter from the international section at Whole Foods when I'm feeling fancy, but regular unsalted butter works just fine. Toast your walnuts (if using) in a dry pan for about 3 minutes—they add a nice crunch that balances the fudgy texture.
No cocoa powder? Melted dark chocolate at double the weight works in a pinch, but it changes the texture slightly. Running short on butter? Vegetable oil at the same volume keeps things moist, though the texture gets slightly denser. Swap the espresso powder for strong brewed coffee at half the amount—just make sure it's cooled before mixing. The sugar combo gives that perfect balance of sweetness and caramel notes. If you only have white sugar, reduce the brown sugar by half and add a pinch of molasses for depth. For the chocolate chips, Enjoy Life brand is my go-to if you're avoiding dairy—same great flavor without the allergens.
This batter keeps for 2 days in the fridge if you want to prep ahead, but honestly, it's best baked fresh. Once baked, store in an airtight container at room temperature for 5 days or freeze for 3 months. I always make a double batch—half gets eaten in one sitting, the rest freezes beautifully. To reheat, pop a square in the microwave for 10 seconds. The cracks on top? Those are your quality indicators—if they're missing, the oven was too hot. Trust the recipe, not your guesswork.
Why You'll Love This Recipe
- Fewer Ingredients, Bigger Payoff: I swear by this recipe because it’s that simple—just butter, sugars, cocoa, and espresso powder. No weird substitutions, no last-minute store runs. The Dutch-processed cocoa alone makes these fudgier than anything from a box, and the espresso powder? It’s the secret that deepens the chocolate without tasting bitter.
- Rich Without the Fuss: That combo of granulated and brown sugar? It creates this perfect balance—chewy edges, crackly top, and a molten center that’s dangerously good. The espresso powder cuts through the sweetness just enough to make every bite feel like a little luxury, not a chore.
- Weeknight or Party Star: I make these for lazy Mondays (because yes, even on a Tuesday night) and they’re just as welcome at a potluck as they are in my lunchbox. The rich flavor means they’re impressive enough for guests, but the ease means I’m not stressing about it.
Instructions for baker's brownies recipe: fudgy cracks and rich chocolate depth
Here's how to make brownies with perfect fudgy texture and those coveted crackly tops.
Cream Butter and Sugars Together
In a large mixing bowl, combine the 1 cup unsalted butter, 1.5 cups granulated sugar, and 0.5 cup packed brown sugar. Beat with an electric mixer on medium-high speed for 3-4 minutes until the mixture is light and fluffy. You'll notice it nearly doubles in volume and turns a pale golden color.
This creaming process incorporates air into the batter, which creates those beautiful crackly tops we all love. Don't rush this step—under-creaming leads to dense brownies instead of the light, airy texture we want. If your butter isn't softened, let it sit at room temperature for 20-30 minutes before starting.
Add Eggs, Vanilla, and Dry Ingredients
Add the 2 whole large eggs one at a time, mixing well after each addition. Then stir in the 2 teaspoons vanilla extract, 0.75 cup dutch-processed cocoa powder, 2 tablespoons espresso powder, 0.5 teaspoon baking powder, 0.5 teaspoon salt, and 0.75 cup all-purpose flour. Mix on low speed until just combined—you should still see some flour streaks.
I like to use a spatula at this point to gently fold in the dry ingredients, ensuring everything is evenly distributed. Overmixing develops gluten, which can make your brownies tough. The batter should be thick but smooth, like pudding. If it seems too dry, add 1 tablespoon vegetable oil to help bind everything together.
Incorporate Hot Water and Chocolate
In a separate small bowl, whisk together the 0.5 cup vegetable oil and 0.5 cup hot water. Slowly pour this mixture into the batter while mixing on low speed. Then fold in the 1.5 cups dark chocolate chips (and 1 cup optional walnuts if using) by hand with a spatula. Make sure the chocolate is evenly distributed throughout the batter.
Here's the thing—adding hot water to dissolve the sugar creates a smoother batter that bakes up more evenly. The chocolate chips will melt slightly as they bake, creating pockets of molten chocolate in every bite. If you're adding walnuts, toast them first in a dry pan over medium heat for 2-3 minutes until fragrant to enhance their flavor.
Bake to Perfect Fudgy Perfection
Preheat your oven to 350°F and line an 8x8-inch baking pan with parchment paper, leaving an overhang on the sides for easy removal. Spread the batter evenly into the pan, using a spatula to smooth the top. Tap the pan gently on the counter a few times to release any air bubbles.
Bake for 25-30 minutes, or until a toothpick inserted in the center comes out with a few moist crumbs (not wet batter). The edges should be set, but the center should still look slightly underdone. This ensures that fudgy texture we're after. Don't overbake—once they cool, brownies firm up and become less fudgy.
Cool and Cut for Maximum Enjoyment
Remove the pan from the oven and let the brownies cool in the pan for 15 minutes before transferring to a wire rack to cool completely. This resting period is crucial—it allows the brownies to set properly and prevents them from falling apart when you cut them.
Once fully cooled, use a sharp knife to cut the brownies into squares. For cleaner cuts, dip the knife in hot water between each cut. Serve at room temperature for the best texture. These brownies will keep well at room temperature for 3-4 days in an airtight container, though they rarely last that long in my house!
Pro Tips For Making Baker'S Brownie
- Melt Butter Slowly: I learned this the hard way—dumping cold butter straight into hot sugar makes your mixture seize up like a stubborn mule. Warm the butter in the microwave for 30 seconds first, then let it cool slightly before adding to the sugar. The goal is melted but not hot enough to shock the sugars into crystallization.
- Sift the Cocoa Twice: Dutch-processed cocoa powder clumps like a grumpy old man if you don’t treat it right. Sift it before measuring into the recipe, then sift it again right into your mixing bowl. This keeps your brownies dense and fudgy instead of dry and crumbly—trust me, the texture difference is night and day.
- Stop When It’s Slightly Under: Your oven lies. Brownies look "done" at 325°F (163°C) but need another 5–10 minutes to set properly. Pull them out when the edges are set but the center still jiggles just a little—like a wobbly Jell-O. Overbaking turns them into hockey pucks, and nobody wants that.
- Chill the Batter: Skip this, and your brownies might crack like a sunbaked sidewalk. Pour the batter into your pan, then pop it in the fridge for 20–30 minutes before baking. The cold start keeps them from spreading into a sad, thin puddle and gives you that perfect, crackly top. (Yes, even if you’re impatient like me.)
Dietary considerations for baker's brownie
Gluten-Free Adaptation
Replace the 0.75 cup all-purpose flour with a 1:1 gluten-free baking flour blend like Bob's Red Mill or King Arthur. These blends contain xanthan gum, which mimics gluten's binding properties. For extra insurance, add ½ teaspoon xanthan gum directly to the batter.
The texture will be slightly denser but still delicious. I've tested this version and found that gluten-free brownies hold together beautifully when cooled properly. 🌱
Dairy-Free Options
Swap the 1 cup unsalted butter for 1 cup dairy-free butter like Earth Balance or Miyoko's. Replace the 1.5 cups dark chocolate chips with dairy-free chips from Enjoy Life or Pascha. The espresso powder and vegetable oil remain unchanged.
The flavor stays rich, though the texture may be slightly less tender. I recommend adding 1 tablespoon cornstarch to compensate for the lack of butter's moisture.
Vegan Version
For a fully plant-based treat, use 1 cup coconut oil instead of butter, and replace the 2 eggs with 2 tablespoons ground flaxseed mixed with 6 tablespoons water (let sit for 5 minutes to thicken). Substitute dairy-free chocolate chips and ensure your cocoa powder is vegan-certified.
The batter will be thicker, so reduce the hot water to ¼ cup to maintain proper consistency. These brownies have a slightly denser texture but pack incredible chocolate flavor. 💚
Nut-Free Alternative
Skip the walnuts entirely, but consider adding ½ cup dairy-free white chocolate chips for contrast or ¼ cup crushed pretzels for a salty crunch. The texture remains fudgy without nuts, and the flavor stays rich.
I've found that adding 1 teaspoon vanilla bean paste instead of extract enhances the depth when nuts aren't present. The brownies hold together beautifully and satisfy that chocolate craving without any nutty distractions.
Lower Sugar Swaps
Reduce the 1.5 cups granulated sugar and 0.5 cup brown sugar to 1 cup each, then add ¼ cup monk fruit sweetener or 2 tablespoons erythritol to maintain sweetness. The texture becomes slightly denser but still fudgy.
For extra richness, increase the cocoa powder to 0.85 cups. These lower-sugar brownies satisfy sweet cravings without the sugar crash, and I've tested them with great success. 💡
Allergen-Friendly Notes
For egg-free brownies, use 2 tablespoons ground flaxseed mixed with 6 tablespoons water as an egg substitute. If avoiding gluten, use a dedicated gluten-free flour blend with xanthan gum. For nut-free kitchens, omit all nuts and opt for dairy-free chocolate chips.
Always check labels on cocoa powder and chocolate chips for hidden allergens. Cross-contamination can be a concern, so I recommend using separate utensils and pans when baking for multiple dietary needs. ✨
Nutrition facts
Frequently asked questions
Why do these brownies have that signature crackly top?
Those coveted cracks form from proper creaming of the butter and sugars, which incorporates air into the batter. Baking at 350°F for 25-30 minutes creates the ideal surface tension—edges set while the center stays slightly underdone. Overbaking destroys the cracks, so trust the toothpick test (moist crumbs, not wet batter).
Can I make these brownies cakey instead of fudgy?
For a cakey texture, reduce the cocoa powder to 0.6 cups and increase the flour to 1 cup. Add 1 extra egg white for structure and bake at 325°F for 35-40 minutes. The key is longer baking time—cakey brownies need fully set edges. The cracks will be fewer, but the interior will be lighter and less dense.
What if my brownies turn out too dry or crumbly?
Dry brownies usually mean overbaking or insufficient fat. Next time, reduce baking time by 2-3 minutes and consider adding 1 tablespoon vegetable oil to the batter. For extra moisture, brush warm brownies with 1 teaspoon simple syrup (equal parts sugar + water, heated until dissolved). Store in an airtight container with a slice of bread to absorb excess dryness.
How do I prevent my brownies from sticking to the pan?
Line your 8x8-inch pan with parchment paper, leaving overhangs for easy removal. For extra insurance, lightly grease the parchment with butter or oil. Avoid nonstick spray—it can create a barrier that prevents proper browning. Tap the pan gently on the counter after filling to release air bubbles, which helps the brownies release cleanly when cooled.
Can I make these brownies in advance?
Yes! The batter keeps for 2 days in the fridge, but bake fresh for best results. Fully baked brownies store at room temperature for 5 days in an airtight container or freeze for 3 months. To reheat, microwave for 10 seconds—just enough to soften any firmness without drying them out. The flavor actually improves after 24 hours as the moisture redistributes.