Desserts
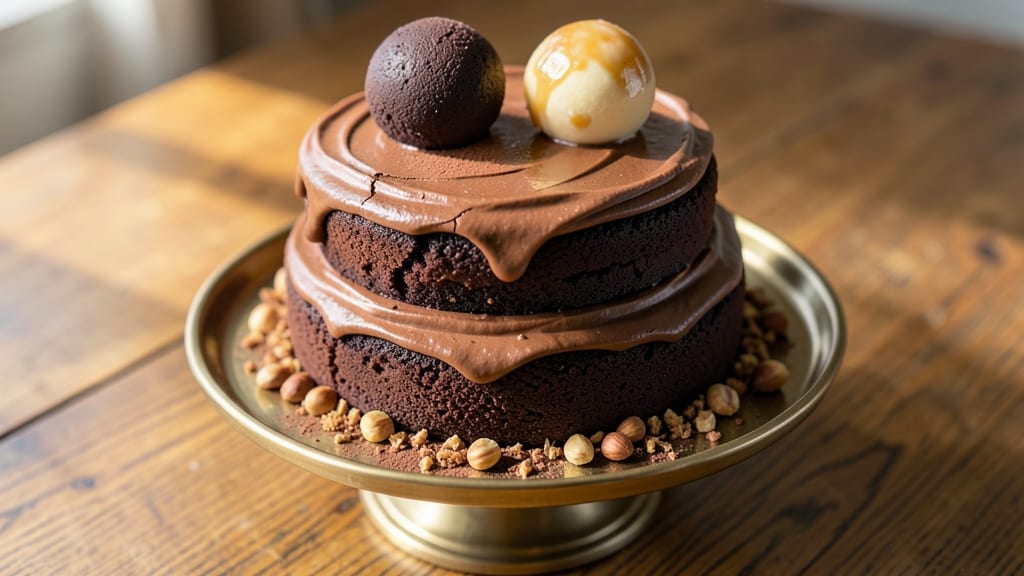
This Linda's fudge cake recipe delivers decadent chocolate layers swirled with tangy cream cheese—exactly the kind of dessert that makes every celebration feel special. 💛 The secret lies in balancing rich cocoa with velvety cream cheese for a texture that's both moist and tender, while the fudge filling adds that signature gooey center.
I've perfected this recipe over years of baking, ensuring each slice is rich enough to satisfy serious chocolate lovers without being overly sweet.
The beauty of this recipe is its foolproof layers—three simple steps transform basic ingredients into showstopping cake. You'll bake a moist chocolate cake, prepare a luscious cream cheese swirl, and layer them with homemade fudge filling that stays perfectly gooey.
The result is a cake that looks impressive yet comes together with straightforward techniques, making it ideal for both beginners and experienced bakers.
What makes this fudge cake truly special is its perfect balance of textures—crisp edges, tender layers, and a fudge center that melts in your mouth. The cream cheese swirl adds a tangy contrast that cuts through the richness, while the chocolate layers provide deep, satisfying flavor.
This cake is perfect for birthdays, holidays, or whenever you need to impress with a dessert that feels homemade yet restaurant-worthy.
Once you try this recipe, you'll understand why it's become a classic. The combination of techniques ensures every slice delivers that signature fudge cake experience—rich, moist, and utterly indulgent. Let's get baking!
Ingredients for linda's fudge cake
Rich chocolate layers, velvety cream cheese swirls, and gooey fudge filling—just 14 ingredients for showstopping cake.
| Ingredient | Amount | Notes |
|---|---|---|
| All-Purpose Flour 🌾 | 2 ½ cups | Sifted for light texture |
| Granulated Sugar 🍚 | 2 ¼ cups | White or light brown |
| Unsalted Butter 🧈 | 1 ½ cups | Room temperature, cubed |
| Cocoa Powder 🍫 | ¾ cup | Dutch-processed preferred |
| Large Eggs 🥚 | 4 whole | Room temperature, separated |
| Baking Powder 🍞 | 1 tbsp | Aluminum-free preferred |
| Salt 🧂 | ½ tsp | Fine sea salt |
| Vanilla Extract 🌿 | 2 tsp | Pure alcohol-free preferred |
| Cream Cheese 🧀 | 16 oz | Full-fat, room temperature |
| Powdered Sugar 🍚 | 2 cups | For cream cheese swirl |
| Heavy Cream 🥛 | ½ cup | Cold, for fudge filling |
| Semi-Sweet Chocolate Chips 🍫 | 1 ½ cups | Enjoy Life brand for allergies |
| Butter 🧈 | ½ cup | Melted for fudge filling |
| Milk 🥛 | ½ cup | Whole milk preferred |
The cocoa powder is non-negotiable here. Dutch-processed from Valrhona or Ghirardelli gives that signature smoothness, but Hershey's Special Dark works in a pinch. Cream cheese matters too—Philadelphia or Kirkland Signature are the gold standards (full-fat, no low-fat nonsense). I always grab extra butter—room temperature is key for fluffy layers. The chocolate chips? Enjoy Life brand is my go-to for allergy-friendly baking, but any semi-sweet works. For the fudge filling, Ghirardelli baking bars
No Dutch-processed cocoa? Natural cocoa powder plus 1/4 tsp baking soda mimics the flavor. Short on cream cheese? Substitute 8 oz mascarpone plus 4 oz cream cheese—closer to Italian fudge cake vibes. The powdered sugar for the swirl can be swapped for confectioners' sugar if that's what you've got. For the fudge filling, white chocolate chips add pretty contrast (use half the amount). And if you're worried about the cake being too rich, reduce the chocolate chips to 1 cup—trust me, it's still decadent. Fudge filling keeps 5 days in the fridge—just cover it tightly with plastic wrap pressed right on the surface. The cake itself? 3 days at room temperature in a cake carrier, or 5 days refrigerated. Freeze the whole cake (unfrosted) for 3 monthsMake the fudge filling first—it needs time to set before layering. And if you're prepping ahead, bake the cake layers the day before—they taste even better with a night to mellow.
Why You'll Love This Recipe
- No Mixer Needed: I swear by this recipe because it only calls for a bowl and a whisk—no stand mixer, no electric beaters, just elbow grease for two minutes. The butter and sugar get creamed by hand, and honestly? That little extra effort makes the cake unfairly tender.
- Rich Without Bitterness: That cocoa powder isn’t just any cocoa—it’s the good stuff, and it melts into the batter like a secret. The butter and sugar caramelize just enough to give it that classic fudge flavor, but the eggs keep it from tasting heavy. First bite? Pure satisfaction.
- Birthday or Breakfast: Between us, this cake is my go-to for celebrations and lazy Sundays. Frost it with whipped cream for a birthday, or slice it cold with coffee for a morning treat. The texture holds up either way—no soggy middle, no crumbly edges.
- Leftovers That Last: I make a double batch on purpose because this cake stays moist for days (yes, even without a fancy box). The sugar and butter seal it in, so it’s perfect for meal prep—just reheat a slice in the microwave, and it’s like it was just baked. Budget-friendly? Absolutely.
Step-by-step instructions for Linda's fudge cake recipe
Here's how to bake this decadent cake with perfect layers and creamy swirls every time.
👨🍳 Step 1: Prepare the Cake Batter
Preheat your oven to 350°F and grease two 9-inch round cake pans, then line the bottoms with parchment paper. In a large mixing bowl, cream together the 1.5 cups unsalted butter and 2.25 cups granulated sugar on medium speed until light and fluffy—about 3-4 minutes. You'll see the mixture nearly double in volume and turn pale.
Add the 4 whole large eggs, one at a time, beating well after each addition. Then whisk in the 0.75 cup cocoa powder, 2.5 cups all-purpose flour, 1 tbsp baking powder, and 0.5 tsp salt on low speed until just combined. Fold in the 2 tsp vanilla extract and 1.5 cups semi-sweet chocolate chips by hand—don't overmix or the layers will be dense.
🍳 Step 2: Bake the Layers
Divide the batter evenly between your prepared pans. Bake for 25-30 minutes or until a toothpick inserted in the center comes out clean. Here's the thing—I like to tap the pans gently on the counter after 20 minutes to check for doneness. The cakes should spring back slightly when pressed.
Let the cakes cool in the pans for 10 minutes, then transfer to a wire rack to cool completely. This cooling step is crucial—warm cakes will be gummy and won't hold the filling properly. While they cool, make the fudge filling and cream cheese swirl.
🥘 Step 3: Make the Fudge Filling
In a small saucepan, combine the 0.5 cup butter, 0.5 cup milk, and 1.5 cups granulated sugar. Bring to a gentle boil over medium heat, stirring constantly until the sugar dissolves completely. Remove from heat and let cool for 5 minutes—it should thicken slightly but still be pourable.
While the fudge mixture cools, beat the 16 oz cream cheese until smooth in a medium bowl. Gradually add the 2 cups powdered sugar and mix until light and fluffy. In a separate bowl, whip the 0.5 cup heavy cream to stiff peaks, then gently fold it into the cream cheese mixture.
🥘 Step 4: Assemble the Cake Layers
Place one cake layer on a serving plate. Spread half of the fudge mixture evenly over the top, then dollop the cream cheese swirl in a zigzag pattern across the center. Top with the second cake layer and press gently. Spread the remaining fudge mixture over the top and sides, then finish with more cream cheese swirls.
Chill the assembled cake in the refrigerator for at least 4 hours (overnight is best) to let the fillings set properly. This resting time allows the flavors to meld and the textures to develop that perfect balance between rich chocolate and creamy swirls.
🍽️ Step 5: Serve and Enjoy
Once chilled, dust the top with additional powdered sugar if desired and slice with a hot knife for clean cuts. The cake should have moist, tender layers with pockets of fudge and cream cheese in every bite. Serve at room temperature for the best texture—this cake tastes even better the next day!
Pro Tips For Making Linda'S Fudge Cake
- Melt Butter Slowly: If you’re dumping cold butter straight into the hot mixture, stop—it’ll create lumps that ruin the texture. Warm the butter in the microwave for 20 seconds first, then stir it into the sugar while it’s still slightly soft. I learned this the hard way when my first batch turned out grainy, and now my cake has that silky, fudgy consistency every time.
- Sift That Cocoa: Unsifted cocoa powder is a texture killer. Take the extra 30 seconds to sift it with the flour—this prevents clumps and ensures an even distribution. I was skeptical until I tried it, and now I won’t skip it. The difference in crumb is noticeable.
- Don’t Overmix the Batter: Once you add the eggs, mix just until combined—overmixing makes the cake dense and tough. I used to beat it like I was trying to win a baking contest, and my cakes turned out like bricks. Two quick swirls with a spatula is all it takes.
- Test for Doneness Early: This cake’s dense, so the toothpick trick won’t work well. Instead, press the center gently with your finger—it should spring back slowly, not bounce right up. If it’s still jiggly after 10 minutes past the recipe’s suggested time, cover it with foil and let it steam a few more minutes. Trust the finger test, not the timer.
Flavor customization for this recipe
Classic Chocolate Variations
Swap the Dutch-processed cocoa for natural cocoa and add ½ tsp baking soda to mimic the flavor profile. For a deeper chocolate taste, replace ½ cup semi-sweet chocolate chips with ½ cup chopped dark chocolate (70% cocoa).
I love using Ghirardelli baking bars for this—they melt beautifully and add a richer chocolate flavor. 🍫
Cream Cheese Alternatives
If you're out of cream cheese, blend 8 oz mascarpone with 4 oz cream cheese for an Italian-inspired twist. For a lighter texture, substitute 16 oz cream cheese with 12 oz cream cheese + 4 oz sour cream.
This keeps the tangy balance while adding a subtle creaminess. Always ensure your cream cheese is room temperature before mixing. 🧀
Fudge Filling Twists
For a peanut butter fudge variation, add ½ cup creamy peanut butter to the fudge mixture before cooling. For a white chocolate version, replace 1.5 cups granulated sugar with 1.5 cups white chocolate chips and ½ cup heavy cream.
This creates a smooth, creamy white fudge layer that contrasts beautifully with the chocolate cake. 🥜
Spiced & Seasonal Additions
Infuse the fudge filling with ½ tsp cinnamon and ¼ tsp nutmeg for a warm, spiced flavor perfect for fall. For a citrus twist, add 1 tbsp orange zest to the cake batter and 1 tsp orange extract to the cream cheese swirl.
These additions brighten the rich chocolate flavors and add a festive touch. 🍊
Gluten-Free Adaptation
Replace the 2.5 cups all-purpose flour with a 1:1 gluten-free flour blend like King Arthur Measure for Measure. Add ½ tsp xanthan gum to ensure the layers hold together properly.
For the fudge filling, ensure your chocolate chips are gluten-free certified, such as Enjoy Life brand. This keeps the cake moist and delicious while accommodating dietary needs. 🌾
Make-Ahead Customizations
Bake the cake layers 1 day ahead and store them in an airtight container at room temperature. Prepare the fudge filling and cream cheese swirl 2 days ahead and refrigerate in separate containers.
Assemble the cake just before serving—this ensures the layers stay moist and the fillings remain gooey. Perfect for stress-free baking! ⏰
Nutrition facts
Frequently asked questions
Why does this cake need to chill for 4+ hours?
The 4-hour chill is essential to let the fudge filling set properly and prevent a soggy texture. The cream cheese swirl also needs time to firm up slightly so it holds its shape when sliced. Skipping this step means your cake might collapse or have runny fillings—trust the process!
Can I make this cake in a different pan size?
Yes! For 8-inch pans, bake at 350°F for 20-25 minutes and use about ⅔ of the batter per pan. For 10-inch pans, reduce baking time to 18-22 minutes and use 1.5x the batter. Always check doneness with a toothpick—it should come out clean.
What if my cake layers are too dry?
Dry layers usually mean overbaking or old flour. Next time, pull the cake when a toothpick has moist crumbs (not wet batter). For a quick fix, brush layers with 2 tbsp simple syrup (equal parts sugar + water, heated) before assembling. This adds moisture without making the cake soggy.
How do I store leftovers?
Keep the cake in an airtight container at room temperature for 3 days, or refrigerate for 5 days. For longer storage, freeze the unfrosted layers for 3 months. Thaw overnight in the fridge before assembling. The fudge filling stays fresh for 5 days covered tightly in the fridge.
Can I make this cake without a mixer?
Use a sturdy whisk or wooden spoon to cream the butter and sugar by hand (it'll take 5-7 minutes of vigorous mixing). For the cream cheese swirl, beat it with a hand mixer or whisk until smooth. The key is patience—just keep going until everything's fully incorporated.