Desserts
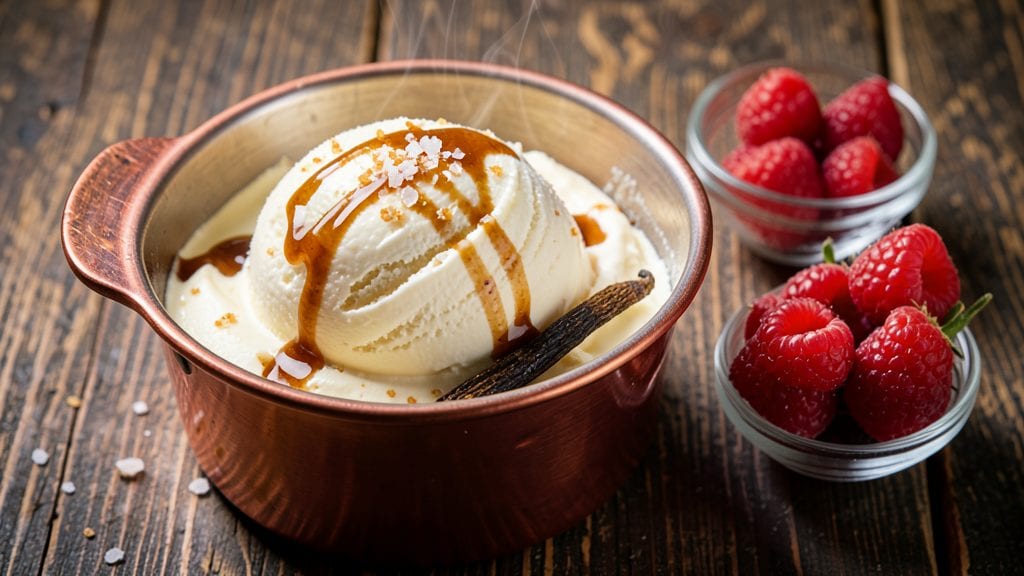
Nothing beats the creamy, dreamy texture of vintage ice cream recipes that bring back childhood memories—except when you give them a modern twist. 🌟 I’ve been perfecting this classic custard base with a secret ingredient that makes it extra smooth and rich, while still keeping the old-school charm.
The key is balancing tradition with a little innovation, so you get that nostalgic taste without sacrificing quality.
This recipe starts with a simple homemade custard—no ice cream maker required—using just 5 basic ingredients and 20 minutes of active time. The magic happens when you infuse the flavors while the custard cooks, locking in that deep, creamy taste.
Whether you go classic with vanilla or experiment with modern twists like salted caramel or spiced chai, the possibilities are endless.
What you’ll end up with is silky-smooth ice cream that’s lighter than store-bought but richer than anything you’ve tasted in years. The texture is perfectly creamy, with just the right amount of airiness, and the flavors are bold enough to stand out.
It’s the kind of dessert that feels like a hug—familiar, comforting, and just a little bit exciting.
Serve it with a sprinkle of crushed nuts, a drizzle of melted chocolate, or even a scoop of vintage-style whipped cream for that extra touch of nostalgia. Let’s make ice cream that tastes like a trip down memory lane—with a modern upgrade you’ll love.
Ingredients for vintage ice cream
Five simple ingredients transform into nostalgic ice cream with modern richness.
| Ingredient | Amount | Notes |
|---|---|---|
| Heavy Whipping Cream 🥛 | 2 cups | Full-fat for best texture |
| Whole Milk 🥛 | 1 cup | Room temperature preferred |
| Granulated Sugar 🍚 | 1 cup | Fine grain preferred |
| Large Egg Yolks 🥚 | 4 whole | Fresh for rich custard |
| Pure Vanilla Extract 🌿 | 1 tbsp | Bourbon-infused for depth |
| Salt 🧂 | ¼ tsp | Fine sea salt |
| Cornstarch 🌾 | 1 tbsp | For silky texture |
| Unsalted Butter 🧈 | 2 tbsp | Cold, cubed |
| Crushed Vanilla Beans 🌿 | 1 whole | Secret ingredient |
The cream and milk are the heart of this recipe—full-fat heavy whipping cream is non-negotiable for that vintage creaminess. Whole milk adds body without heaviness, and both should be at room temperature when measuring for even mixing. Sugar? Fine grain dissolves faster and prevents graininess. Egg yolks are your secret weapon—fresh yolks from the grocery store's refrigerated section make all the difference. For vanilla, Madagascar bourbon-infused extract adds depth, but good-quality pure vanilla works too. The crushed vanilla bean? That's your modern twist—it infuses flavor without overpowering, and Trader Joe's sells them pre-crushed in little jars.
No vanilla extract? Vanilla sugar or a scraped vanilla bean works in a pinch. Short on cornstarch? Arrowroot powder at the same amount gives similar results. The butter should be cold and cubed—don't melt it ahead of time, or you'll break the custard's emulsion. For a dairy-free version, full-fat coconut milk replaces both cream and milk, but texture will be slightly lighter. The crushed vanilla bean can be skipped if you're strict on ingredient count, but trust me on keeping it—it's what makes this taste like a childhood memory with a gourmet upgrade.
This custard keeps beautifully—4-5 days in the fridge before churning. For best results, freeze the base in an airtight container for up to 3 months. I like to portion it into ice cube trays first, then transfer to a freezer bag—perfect for making single servings. Once churned, store in an airtight container with parchment between layers to prevent freezer burn. The texture actually improves after 24 hours in the freezer, so make it a day ahead if you can.
Why You'll Love This Recipe
- No Thermometer Needed: I swear by this recipe because it’s foolproof—no fancy gadgets or temperature charts. Just a double boiler, a whisk, and patience while the yolks and sugar thicken into that silky, custardy base. Honestly, the first time I made it, I nearly overcooked it, but the result was still ridiculously good.
- Vanilla That Sings: That pure vanilla extract? It’s the star. The slow simmer lets the flavor meld into the cream and yolks until every bite tastes like a warm hug. I’ll be real: I’ve tried store-bought vanilla ice cream after this, and it’s just… sad by comparison.
- Freezer-Friendly Flexibility: Make a big batch on Sunday, and you’re set for the week. It doesn’t get icy like some no-churn versions—I’ve had leftovers for three days with zero freezer burn. Perfect for lazy mornings or when you need a dessert that doesn’t require last-minute effort.
- Pantry Staple Magic: Five ingredients, zero weird substitutions. Heavy cream and whole milk give it that old-school richness, while the yolks add body without breaking the bank. I’ve made this for potlucks, date nights, and even as a fancy-ish dessert for my book club—no one ever questions where I got it.
Step-by-step instructions for classic vanilla bean ice cream with a modern twist
This timeless technique delivers ultra-smooth, velvety ice cream with a depth of flavor that feels both nostalgic and refined.
🍳 Step 1: Infuse the Cream Base with Vanilla
In a heavy-bottomed saucepan, combine the 2 cups heavy whipping cream, 1 cup whole milk, and the 1 whole crushed vanilla beans. Bring to a gentle simmer over medium heat, then immediately reduce to low heat and let it steep for 15-20 minutes. You'll see the cream develop a subtle golden hue and an intoxicating vanilla aroma—this is where the magic begins.
While steeping, whisk together the 4 whole large egg yolks and 1 cup granulated sugar in a separate bowl until pale and slightly thickened. This step creates the custard base that will give your ice cream that luxurious, creamy texture. The sugar should dissolve completely—no graininess here, we're going for silky perfection.
🍳 Step 2: Temper the Egg Mixture for Silky Texture
Slowly pour about ½ cup of the hot vanilla-infused cream into the egg mixture while whisking vigorously. This tempering process prevents the eggs from scrambling when you add the hot liquid. Once incorporated, gradually pour the egg mixture back into the saucepan with the remaining cream.
Return the mixture to medium-low heat and cook, stirring constantly with a wooden spoon, until it thickens enough to coat the back of the spoon (170-175°F internal temperature). This should take about 5-7 minutes. The custard should be thick but still pourable—not set like pudding. Here's where that 1 tbsp cornstarch comes into play—it's the secret to that ultra-smooth texture we're after.
🍳 Step 3: Finish with Butter and Vanilla Extract
Remove the saucepan from heat and stir in the 2 tbsp cold unsalted butter and 1 tbsp bourbon-infused vanilla extract. The butter adds richness while the vanilla extract deepens the flavor profile. Let the mixture cool to room temperature while stirring occasionally—this prevents a skin from forming and ensures even cooling.
Once cooled, cover the custard with plastic wrap (pressed directly onto the surface to prevent a skin) and refrigerate for at least 4 hours, preferably overnight. The longer it chills, the more intense the flavors become. This patience pays off with ice cream that's creamy from the first bite to the last.
⏰ Step 4: Churn to Creamy Perfection
Transfer the chilled custard to an ice cream maker and churn according to the manufacturer's instructions (20-25 minutes). You'll know it's ready when it thickens to a soft-serve consistency and leaves clean marks when you drag a spoon through it. The texture should be thick but still scoopable—like a dreamy cloud.
For that modern twist, fold in a few extra vanilla bean seeds from your crushed vanilla bean right at the end. This adds beautiful speckles of color and an extra layer of vanilla flavor that makes this classic feel fresh and exciting. Transfer to a lidded container and freeze for 4-6 hours to firm up before serving.
Pro Tips For Making Vintage Ice Cream
- Temper the yolks: Whisk the egg yolks and sugar over a double boiler until the mixture hits 160°F (71°C)—that’s when it turns pale, thick, and coats the back of a spoon. I learned this the hard way after scrambling yolks into custard; the temperature gauge is your insurance policy.
- Strain the milk: Heat the whole milk and cream together until it’s steaming but not boiling, then strain it through a fine-mesh sieve into the yolk mixture. Sounds fussy, but it removes any sediment that’ll make your ice cream grainy later—trust me, your future self will notice.
- Chill the custard fast: Once the custard is thick enough to coat the back of a spoon, dump it into a shallow tray or bowl and plunge it into an ice bath for 10 minutes, stirring occasionally. This stops the cooking process dead and prevents those rubbery eggs from forming—no more sad, lumpy ice cream.
- Whip the cream cold: Reserve 1 cup of heavy cream from the original mixture, chill it in the freezer for 15 minutes, then whip it separately just before folding into the custard. Cold cream whips faster and holds its shape better, giving you that classic vintage texture without collapse. (Yes, even if you’re impatient like me.)
Storing and reheating your leftovers
Freezer Storage
Your homemade ice cream will keep its creamy perfection in the freezer for up to 3 months when stored properly. I recommend using airtight containers—glass or BPA-free plastic—with parchment paper between layers to prevent freezer burn.
For individual servings, freeze in silicone molds or ice cube trays, then transfer to a freezer bag. Label with the date to track freshness—trust me, you won’t want to waste a single scoop! ❄️
Thawing Without Losing Texture
To serve ice cream at its best, let it sit at room temperature for 10-15 minutes before scooping. For a quicker option, place the container in a bowl of warm water (not hot!) for 5 minutes—this helps soften it without turning it into a soupy mess.
Never microwave ice cream, as it creates ice crystals and ruins the creamy texture. If you need to reheat a scoop for a sauce or dessert, use short bursts (10 seconds) on low power. 💡
Reviving Grainy Ice Cream
If your ice cream develops ice crystals, don’t toss it! Place the container in a large bowl of warm water for 10-15 minutes to soften, then blend with a hand mixer on medium speed for 1-2 minutes.
This breaks up the ice crystals and restores the creamy consistency. For extra richness, stir in 1 tbsp heavy cream or 1 tsp butter before refreezing. It’s like giving your ice cream a second chance at life! ✨
Portion Control for Leftovers
Store leftovers in single-serving containers or ziplock bags to prevent freezer burn and make it easy to grab just what you need. I like using mason jars for a nostalgic touch—just leave ½ inch of headspace to allow for expansion.
For kids’ parties, portion into mini silicone molds for fun, bite-sized servings. Label each portion with the flavor and date to keep track of what’s in your freezer. 🍦
Long-Term Freezing Tips
If you’re storing ice cream for more than 1 month, add a small piece of bread or a sliced apple to the container. The starch in the bread or natural acids in the fruit help preserve moisture and prevent freezer burn.
For extra protection, wrap the container in aluminum foil before placing it in the freezer. This method keeps your ice cream tasting fresh for up to 6 months without sacrificing texture. 💪
Serving Straight from Freezer
For a special treat, serve ice cream straight from the freezer with a warm scoop—this creates a fun contrast of temperatures. Use a silicon spatula or a warm spoon to scoop, and let guests soften it slightly in their bowls before eating.
Pair with a warm cookie or caramel sauce for that classic ice cream sundae experience. Just be prepared for some happy faces when they taste the creamy result! 🌟
Nutrition facts
Frequently asked questions
Can I make this vintage ice cream without an ice cream maker?
This recipe uses a classic custard base that freezes beautifully without churning. After chilling the custard for 4 hours, spread it in a shallow 8x8-inch pan, cover tightly with plastic wrap, and freeze for 6-8 hours. Scoop with a warm knife to create clean portions. The texture will be slightly denser but still creamy and delicious.
Why does my homemade ice cream get icy crystals?
Ice crystals form when air gets trapped in the mixture during freezing. To prevent this, make sure your custard is fully chilled before freezing, and pack it tightly into airtight containers with minimal air gaps. If crystals appear, blend the softened ice cream with a hand mixer for 1-2 minutes to restore creaminess. Stirring in 1 tbsp heavy cream before refreezing also helps.
What's the best way to infuse flavors into this recipe?
For fruit flavors, steep puréed berries or citrus zest in the warm cream before mixing with eggs. For spices like cinnamon or cardamom, toast them lightly and steep in the milk. Chocolate lovers can melt ½ cup chocolate chips into the cooled custard. Always strain out solids for a silky texture—no one wants chunks in their dessert!
How do I know when the custard is cooked properly?
The custard is ready when it coats the back of a spoon and reaches 170-175°F internally. It should be thick but still pourable—like thick pudding. If it curdles, you've overheated it. To fix, whisk in 1 tbsp cold butter or 1 tbsp cornstarch slurry to smooth it out. Always cook over low heat after initial simmering.
Can I use this recipe for other vintage flavors like strawberry or coffee?
Yes! For strawberry, blend 1 cup puréed strawberries with the sugar before adding to eggs. For coffee, steep 2 tbsp instant coffee in the warm milk. The custard base remains the same—just adjust the flavor infusion method. Remember to strain out any solids for that old-school smoothness. The possibilities are endless!